In our October 2023 How to with Revu webinar, we reviewed tips and tricks for using Bluebeam’s Document Compare Feature. Below we will go step by step to walk you through how to compare documents easily within Bluebeam.
Have you ever received a file with unmentioned changes? With the compare features in Revu you can easily run a compare on documents to locate any changes made. In this webinar we took a look at the two ways you can run a comparison on files. Both the “Document Compare” and “Overlay Pages” features allow you to view a compared version of each document.
1) Navigation
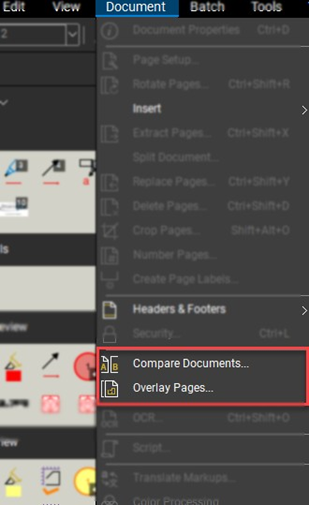
The two features used to compare two documents are listed under the Document menu tab. From here you can see the two options listed:
2) Compare Documents
The Compare Documents feature is used to compare two PDFs and highlight the differences. The differences are indicated with markups that can be reviewed easily using the Markups list.
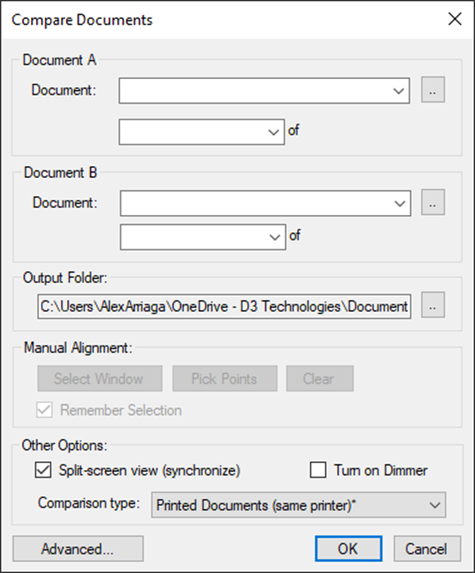
Once you select the Compare Documents option, you are immediately prompted to add two documents to compare.
- Document A – This will be the original document.
- Document B – This is the revised plan or newly received plan that you are unsure if changes were made on.
Once you have the two documents added you can manually align the two documents if needed with the “Pick Points” option. Once setup, hit OK to initiate the compare function.
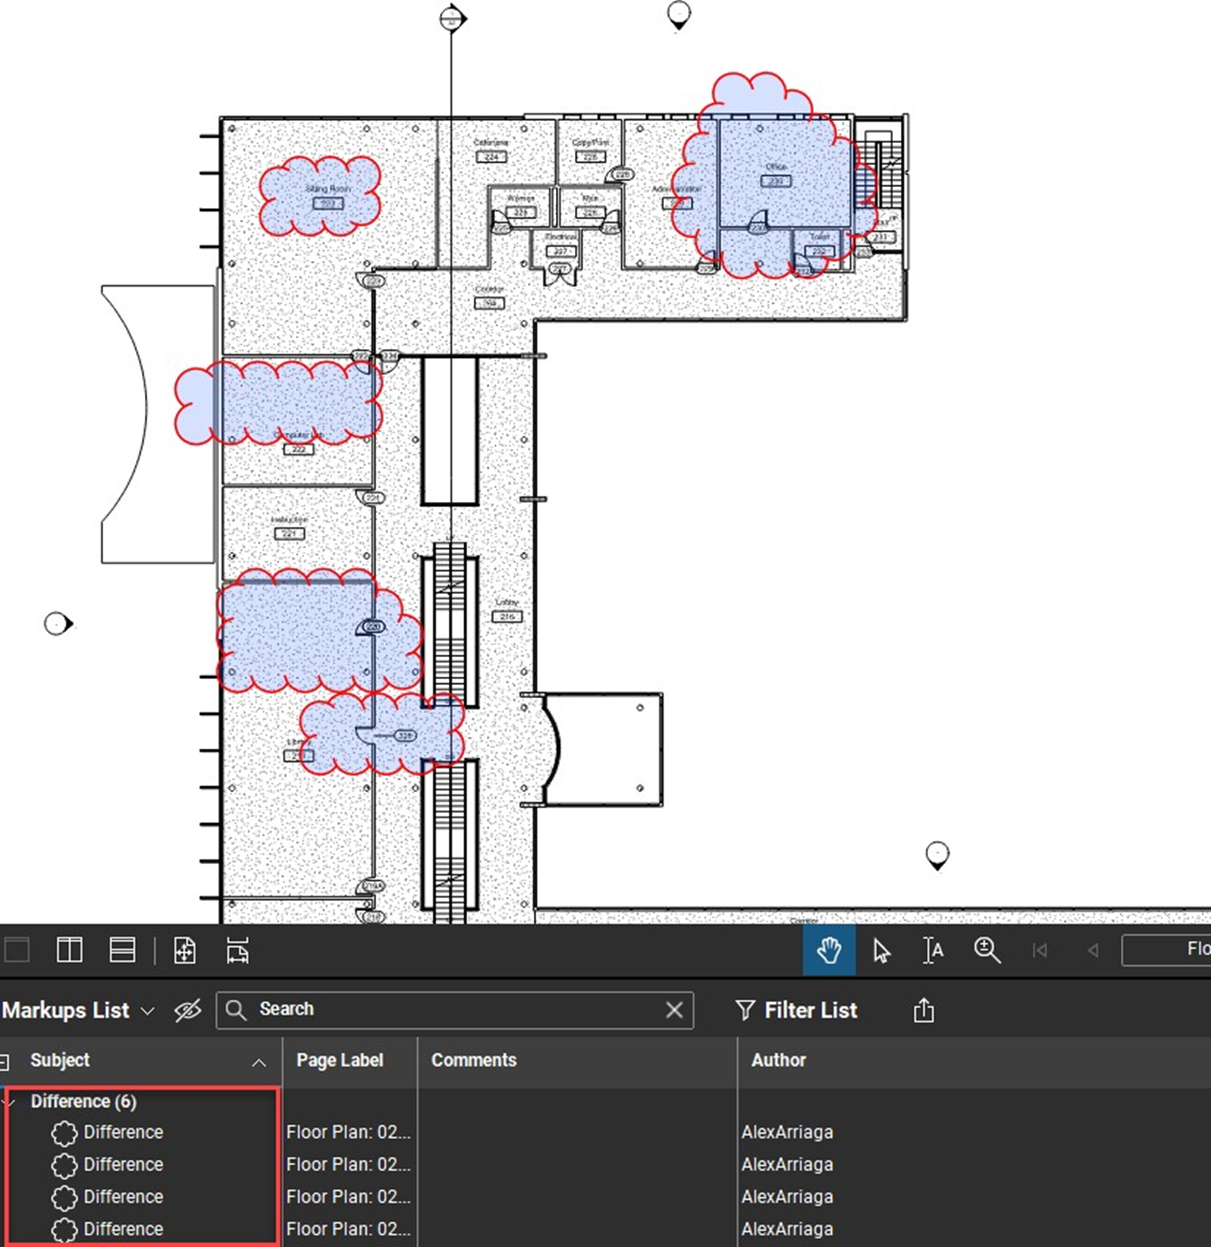
While the compare function is running you can see that a number of Cloud tools are added to the document. These are placed anywhere there is a difference in documents. These clouds are automatically placed by the machine. You will also notice each is listed with a “Difference” title notifying you of its location in the Markups List.
3) Overlay Pages
The overlay process in Revu lets you compare two or more PDFs by converting each document to a different color and stacking them on top of each other as layers in a new PDF. Each layer is transparent and blends with the layers below it.
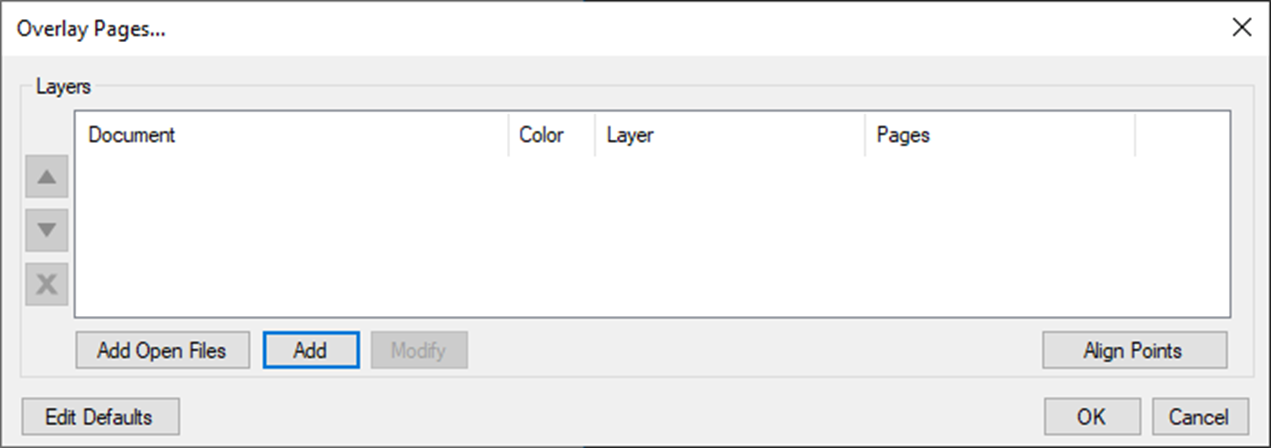
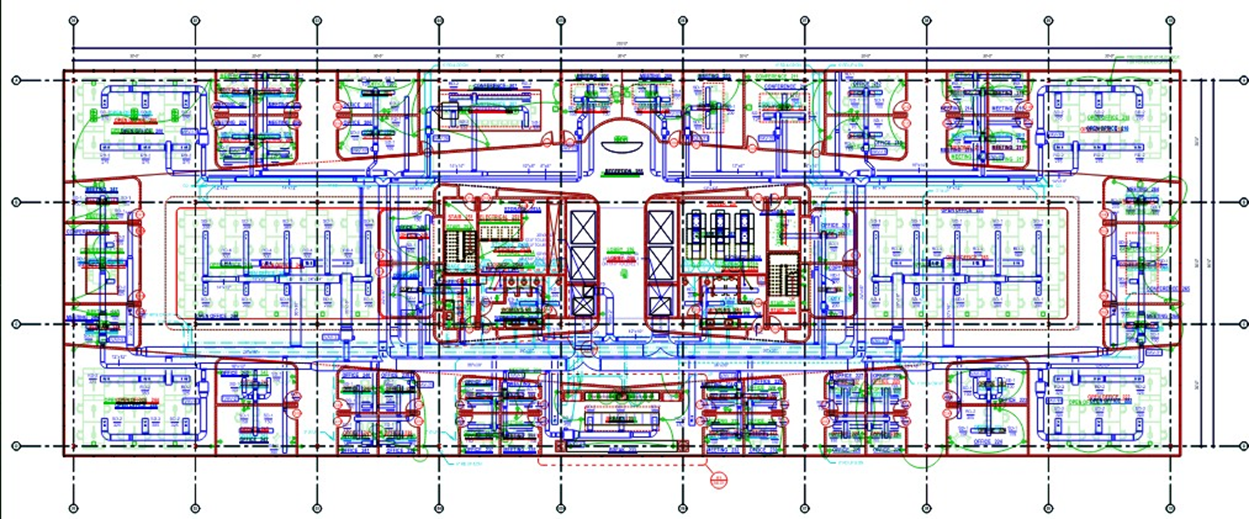
The Overlay Pages feature allows you to select multiple files to overlay. We select a color for each document and align each document if needed. Once we have the documents setup you can select OK. Below you can see multiple files being overlaid in their respective colors.
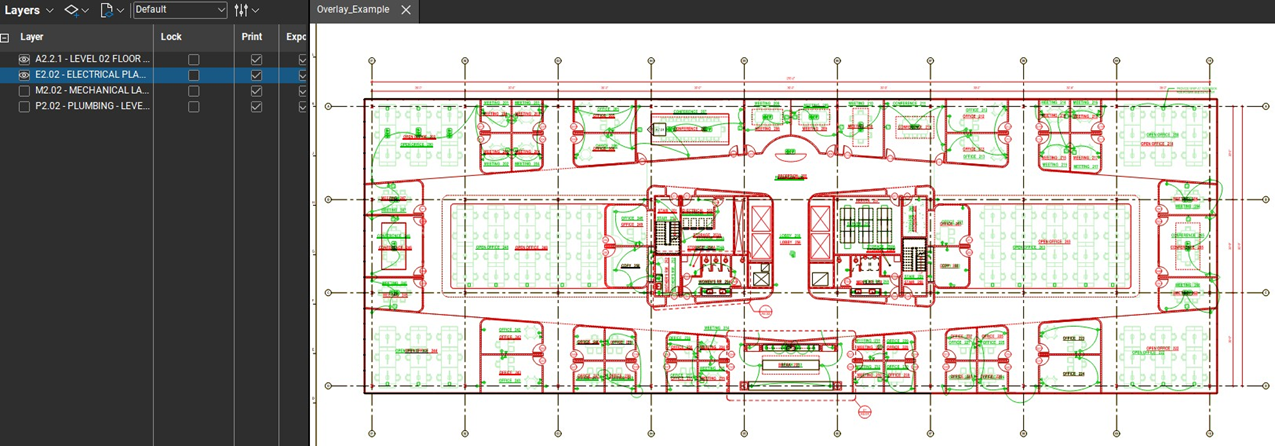
Navigate to the “Layers” panel and you can see each file listed. Selecting the eyeball icon will allow the user to turn the layer on or off. This feature is great for comparing more than one document.
Both features allow you to compare documents. One method has the machine scan and place Cloud markups on any locations that have been changed. The second method being the ability to select multiple files and colors to overlay each document.
Sign up for our next monthly How to with Revu session, where Alex demonstrates a helpful tip for utilizing Bluebeam solutions and then answers all your Revu-related questions for FREE!
Try Bluebeam Complete today. Download your free, 14-day trial here.

Alex Arriaga is a Bluebeam Design Technology Specialist at Team D3. Alex is a Bluebeam Certified Instructor, Bluebeam Certified Support Representative and a member of the Denver Bluebeam User Group. He works with organizations and individuals in furthering their workflows with and knowledge of Bluebeam Revu.

Bluebeam, Revu, and Studio are registered trademarks of Bluebeam, Inc., used under license.


